getting connected
Installation Guides
Dial *#06# to check if your phone can use eSIM
Spotting “[EID]” after dialing indicates your phone is eSIM-ready!
Remember to ensure your device is not locked to a carrier.

iOS Guides
Automatic (scan QR code)
Manual (enter activation code)
Step 1: Before Travelling
Scroll across to reveal all of the steps.
Installing your eSIM requires a network connection. We advise securing a stable WiFi or mobile data connection for eSIM setup prior to your departure.
1
2
3
4
5
6
7
8
9
10
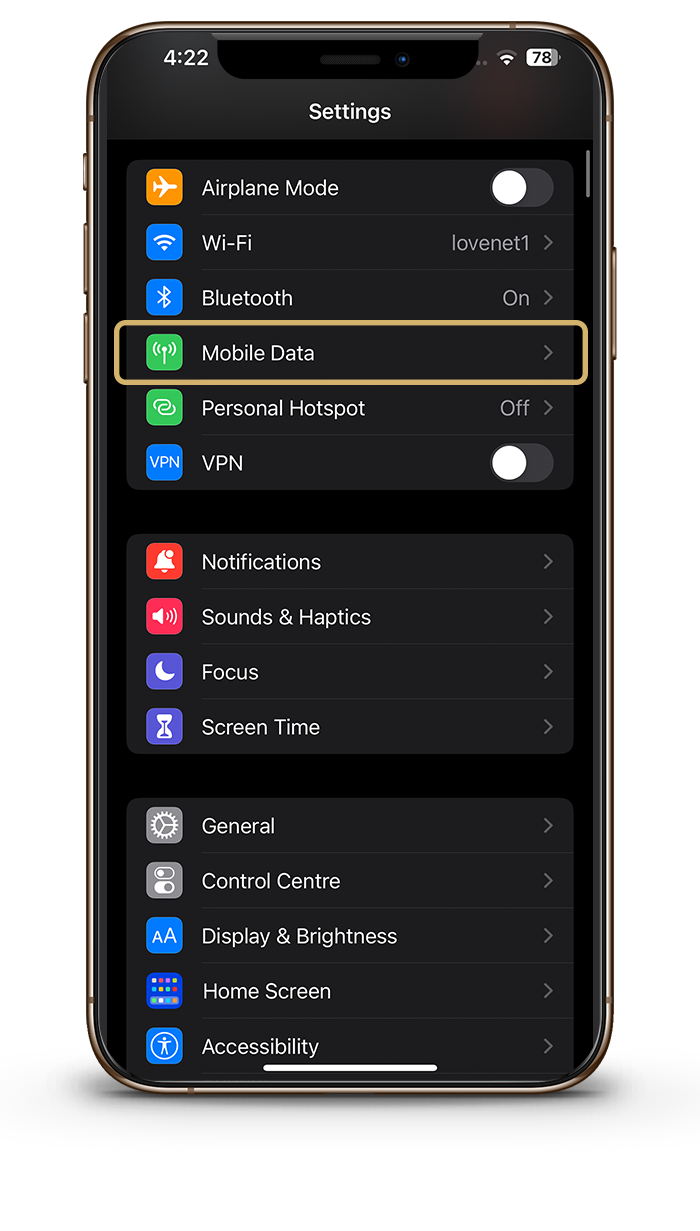
Go to settings - Cellular/Mobile Data
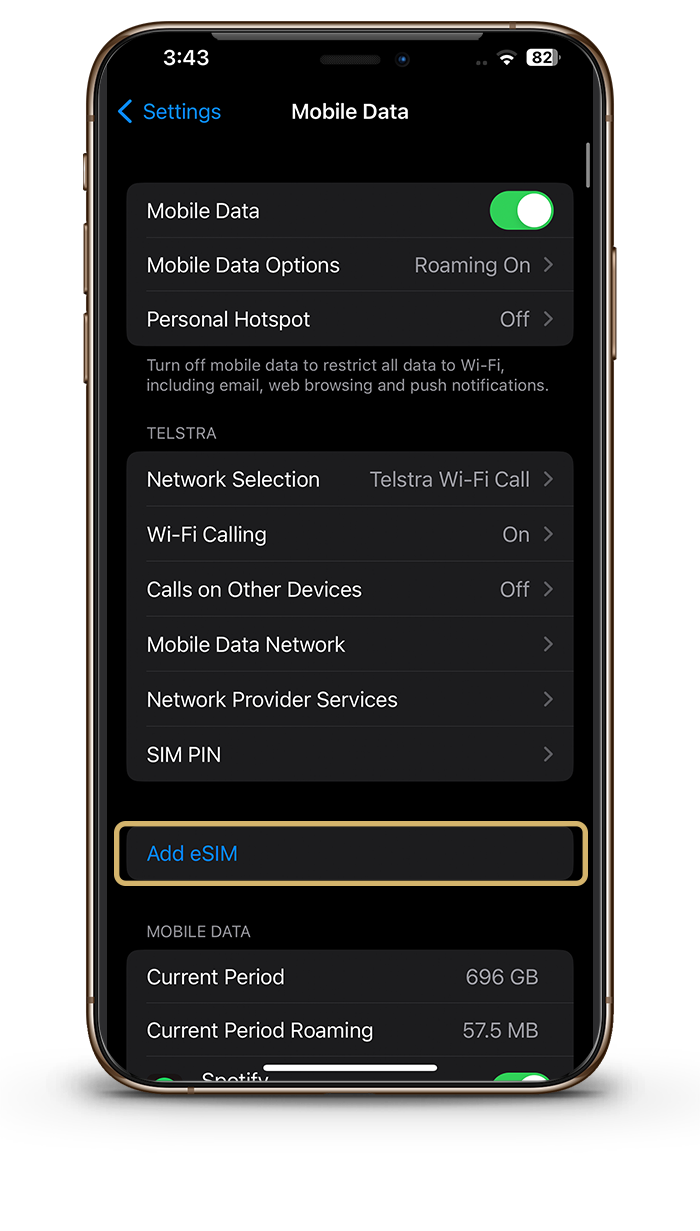
Select - Add eSIM
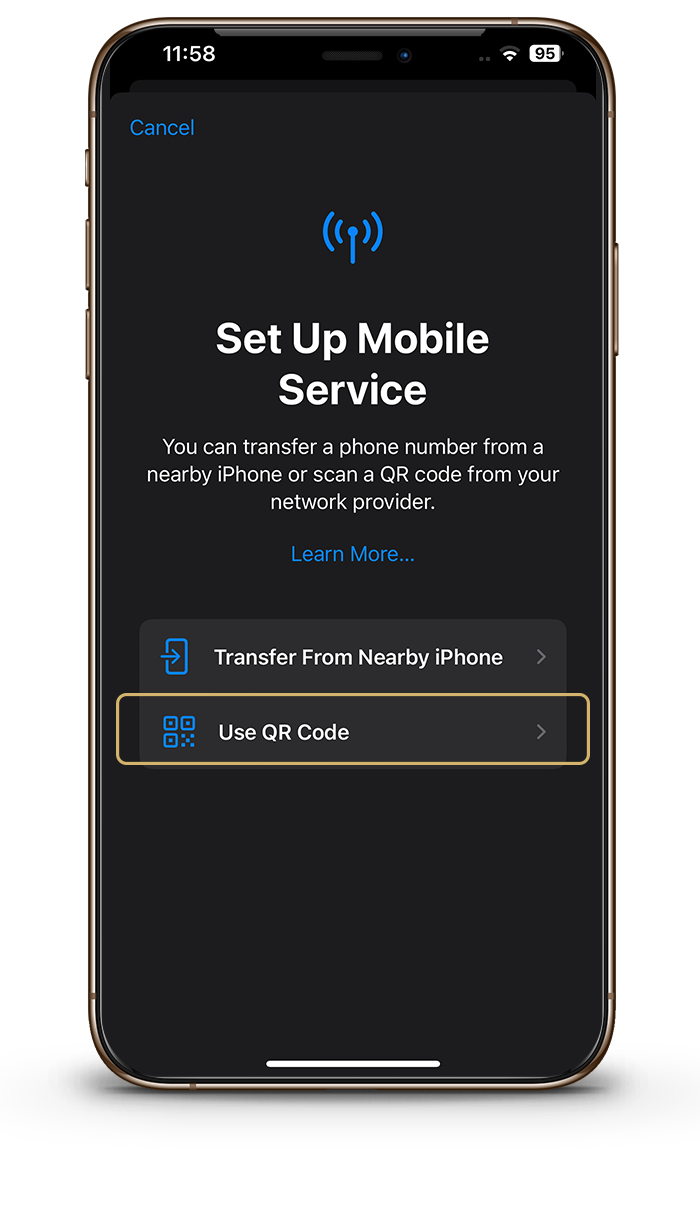
Select use QR code
The QR Code will be sent to you via email upon purchase.
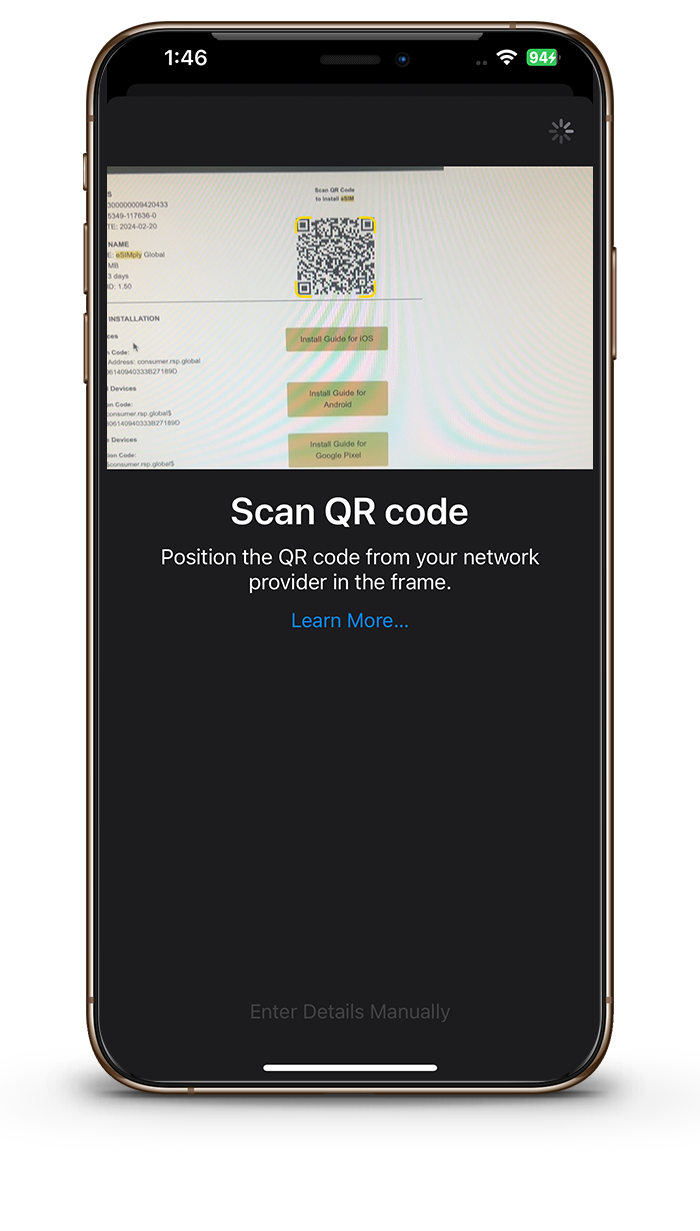
Scan QR code
The QR Code will be sent to you via email upon purchase.
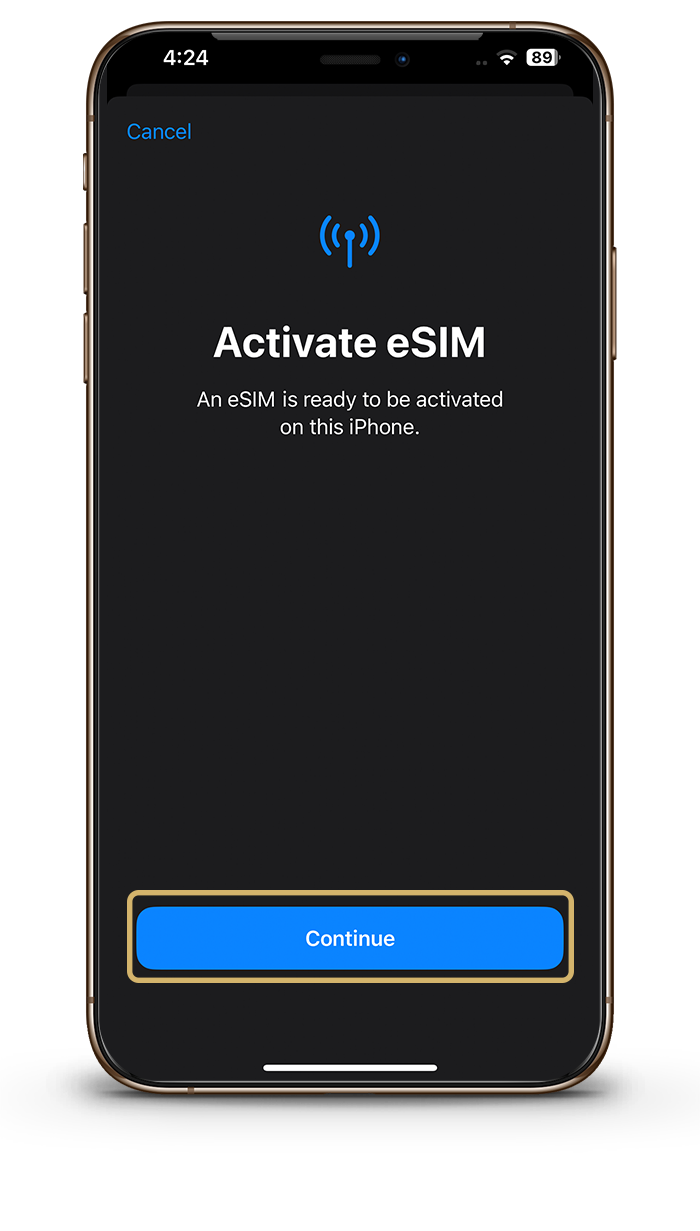
Activate your eSIM
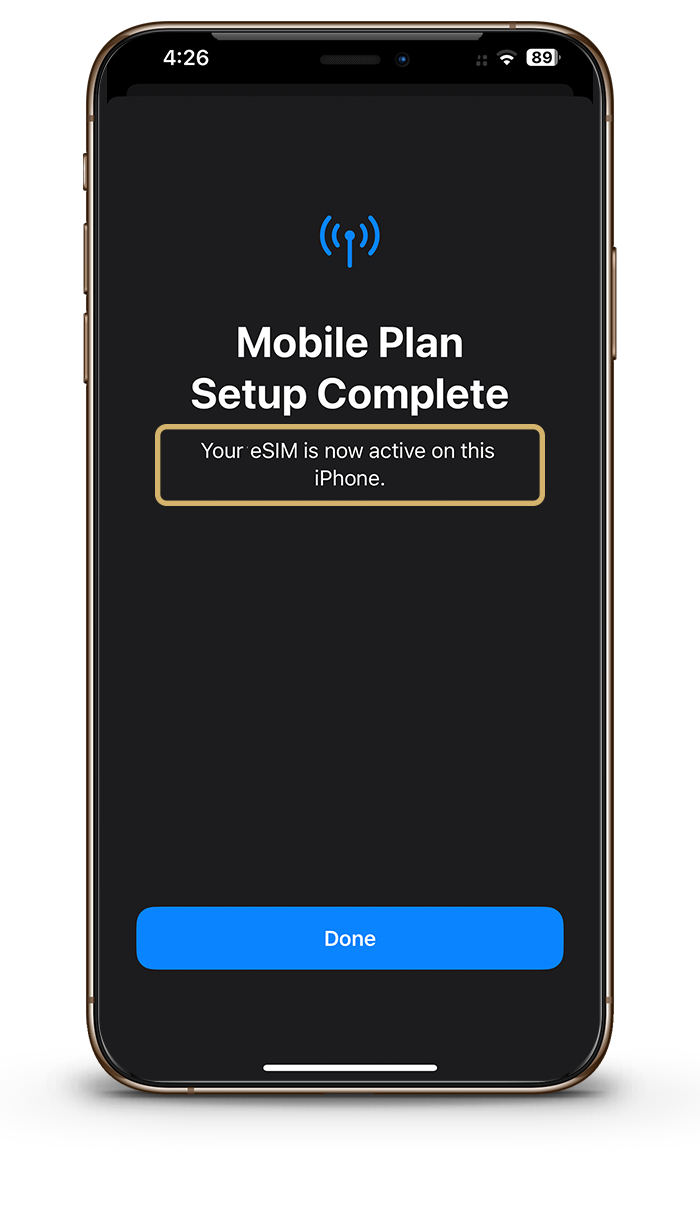
Click done once activated
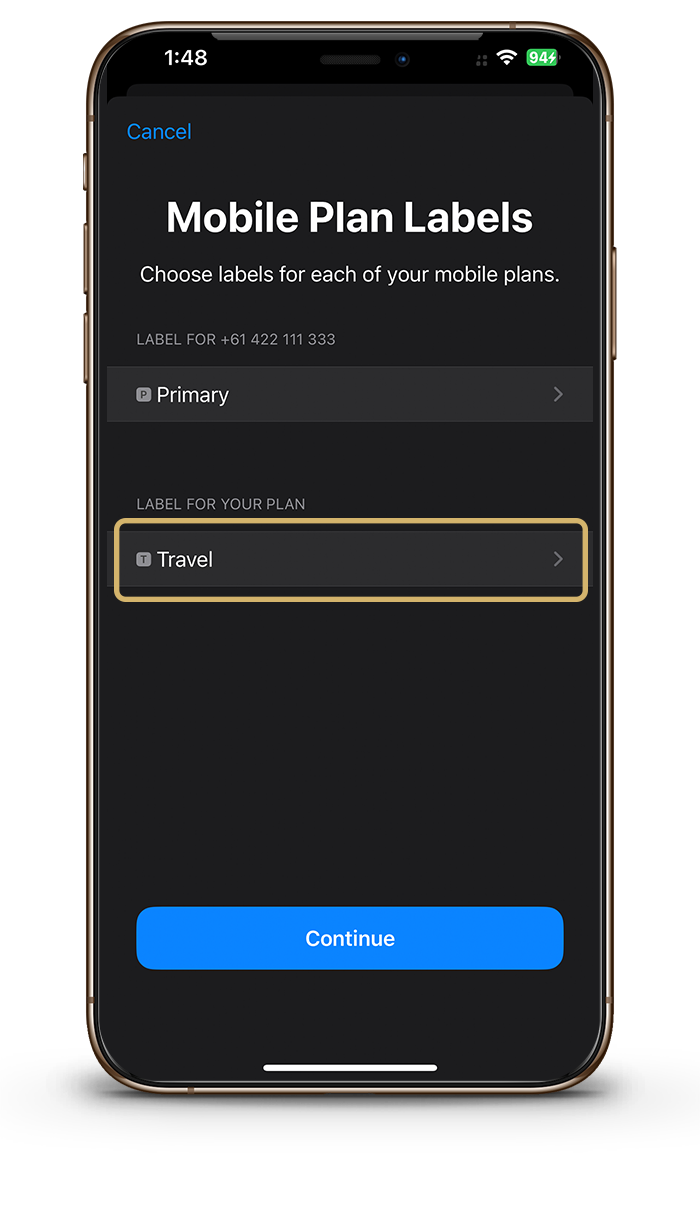
Label your eSIM
Call your eSIM something like travel or the country which it will be used in.
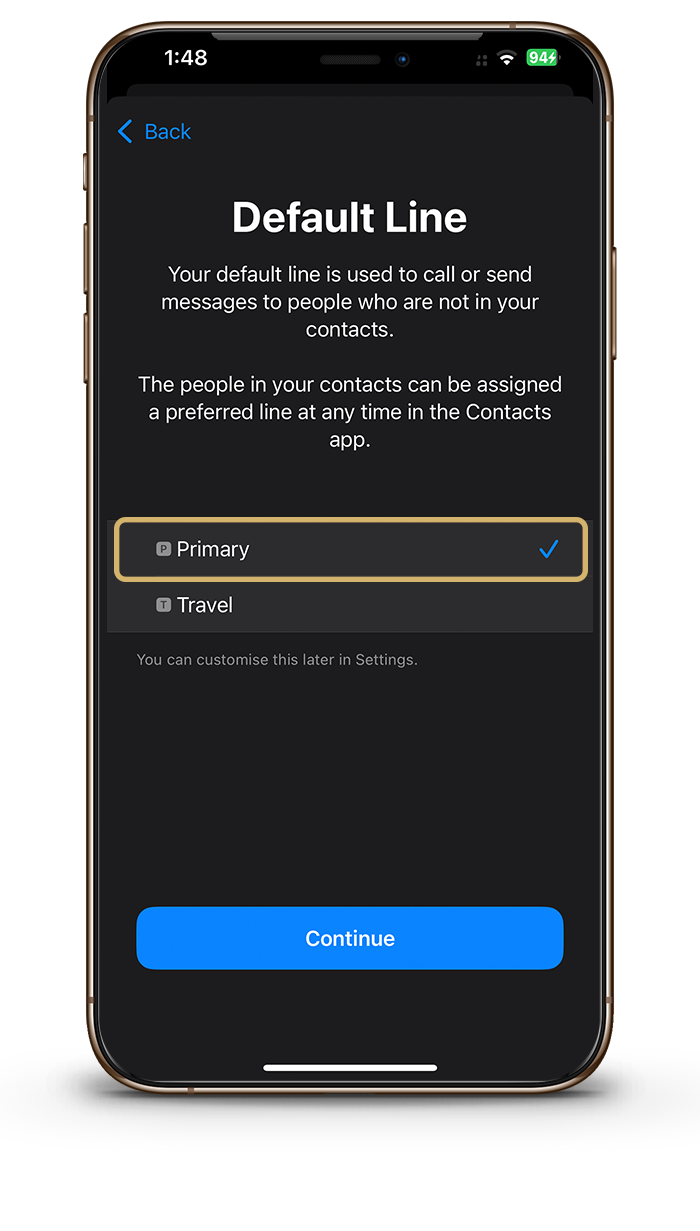
Choose your Default line
The eSIM provides data only so please choose Primary.
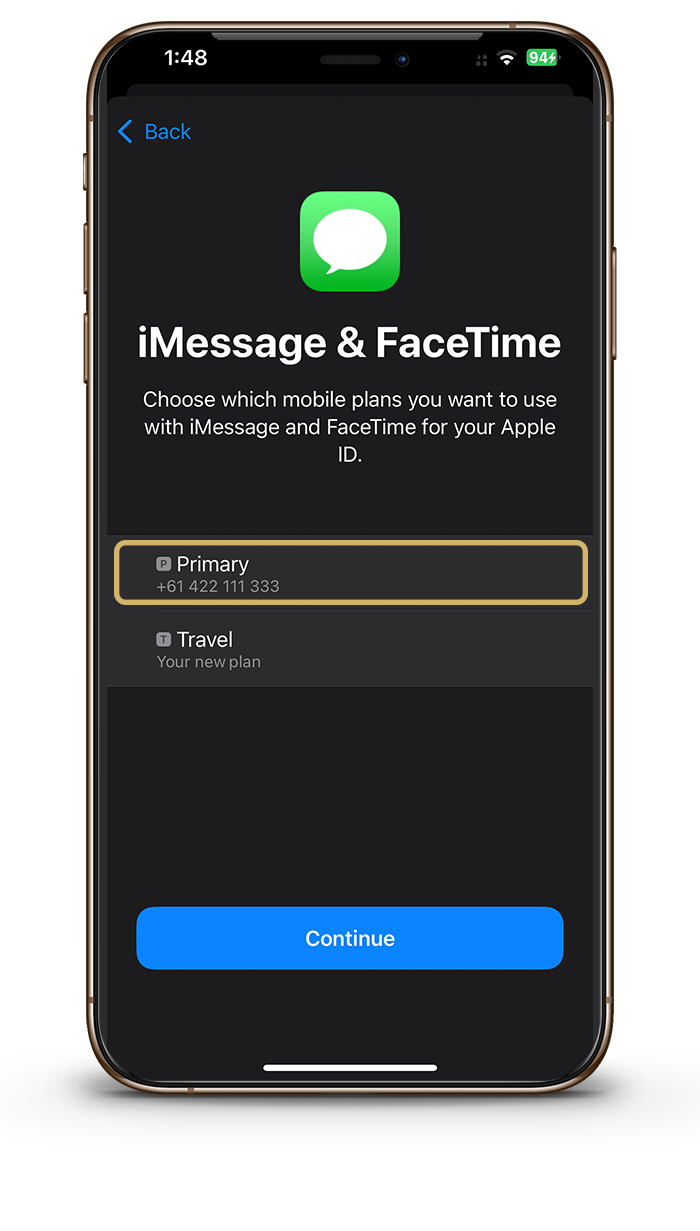
Select Primary
Please choose Primary iMessage & Facetime.
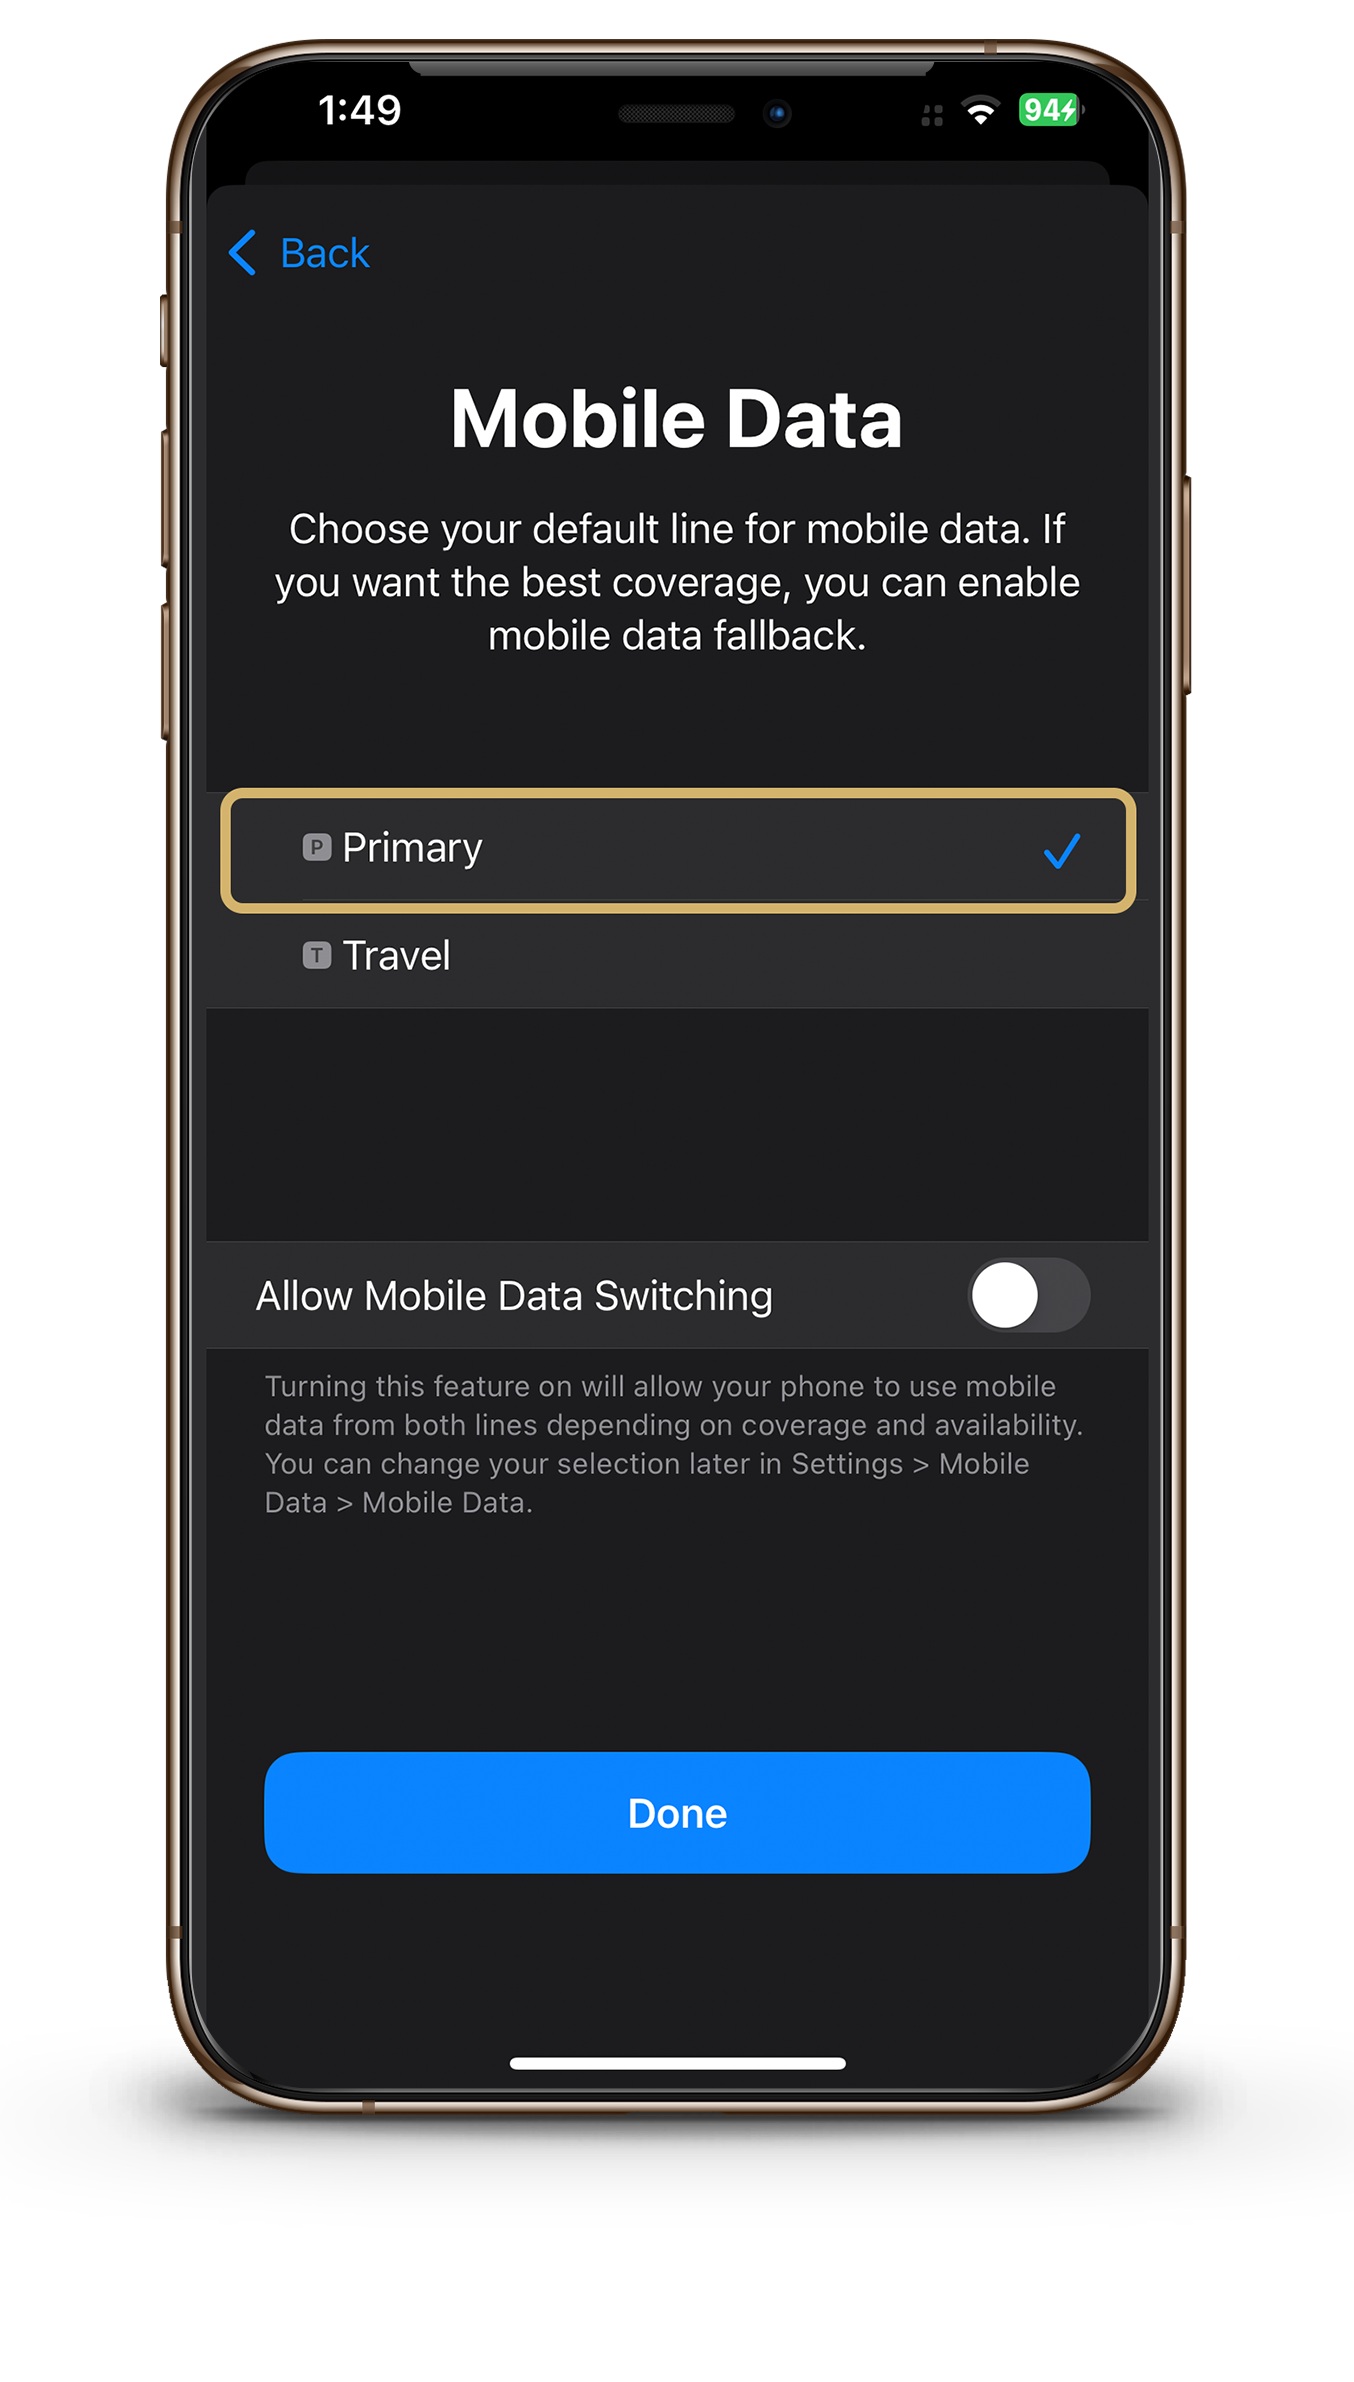
Select Primary
Please choose Primary for mobile data while still in your current location.
Step 2: Once you Arrive at your Destination
Now it's just a matter of switching your data needs to your eSIM.
1
2
3

Go to settings - Cellular/Mobile Data

Select Cellular/Mobile Data
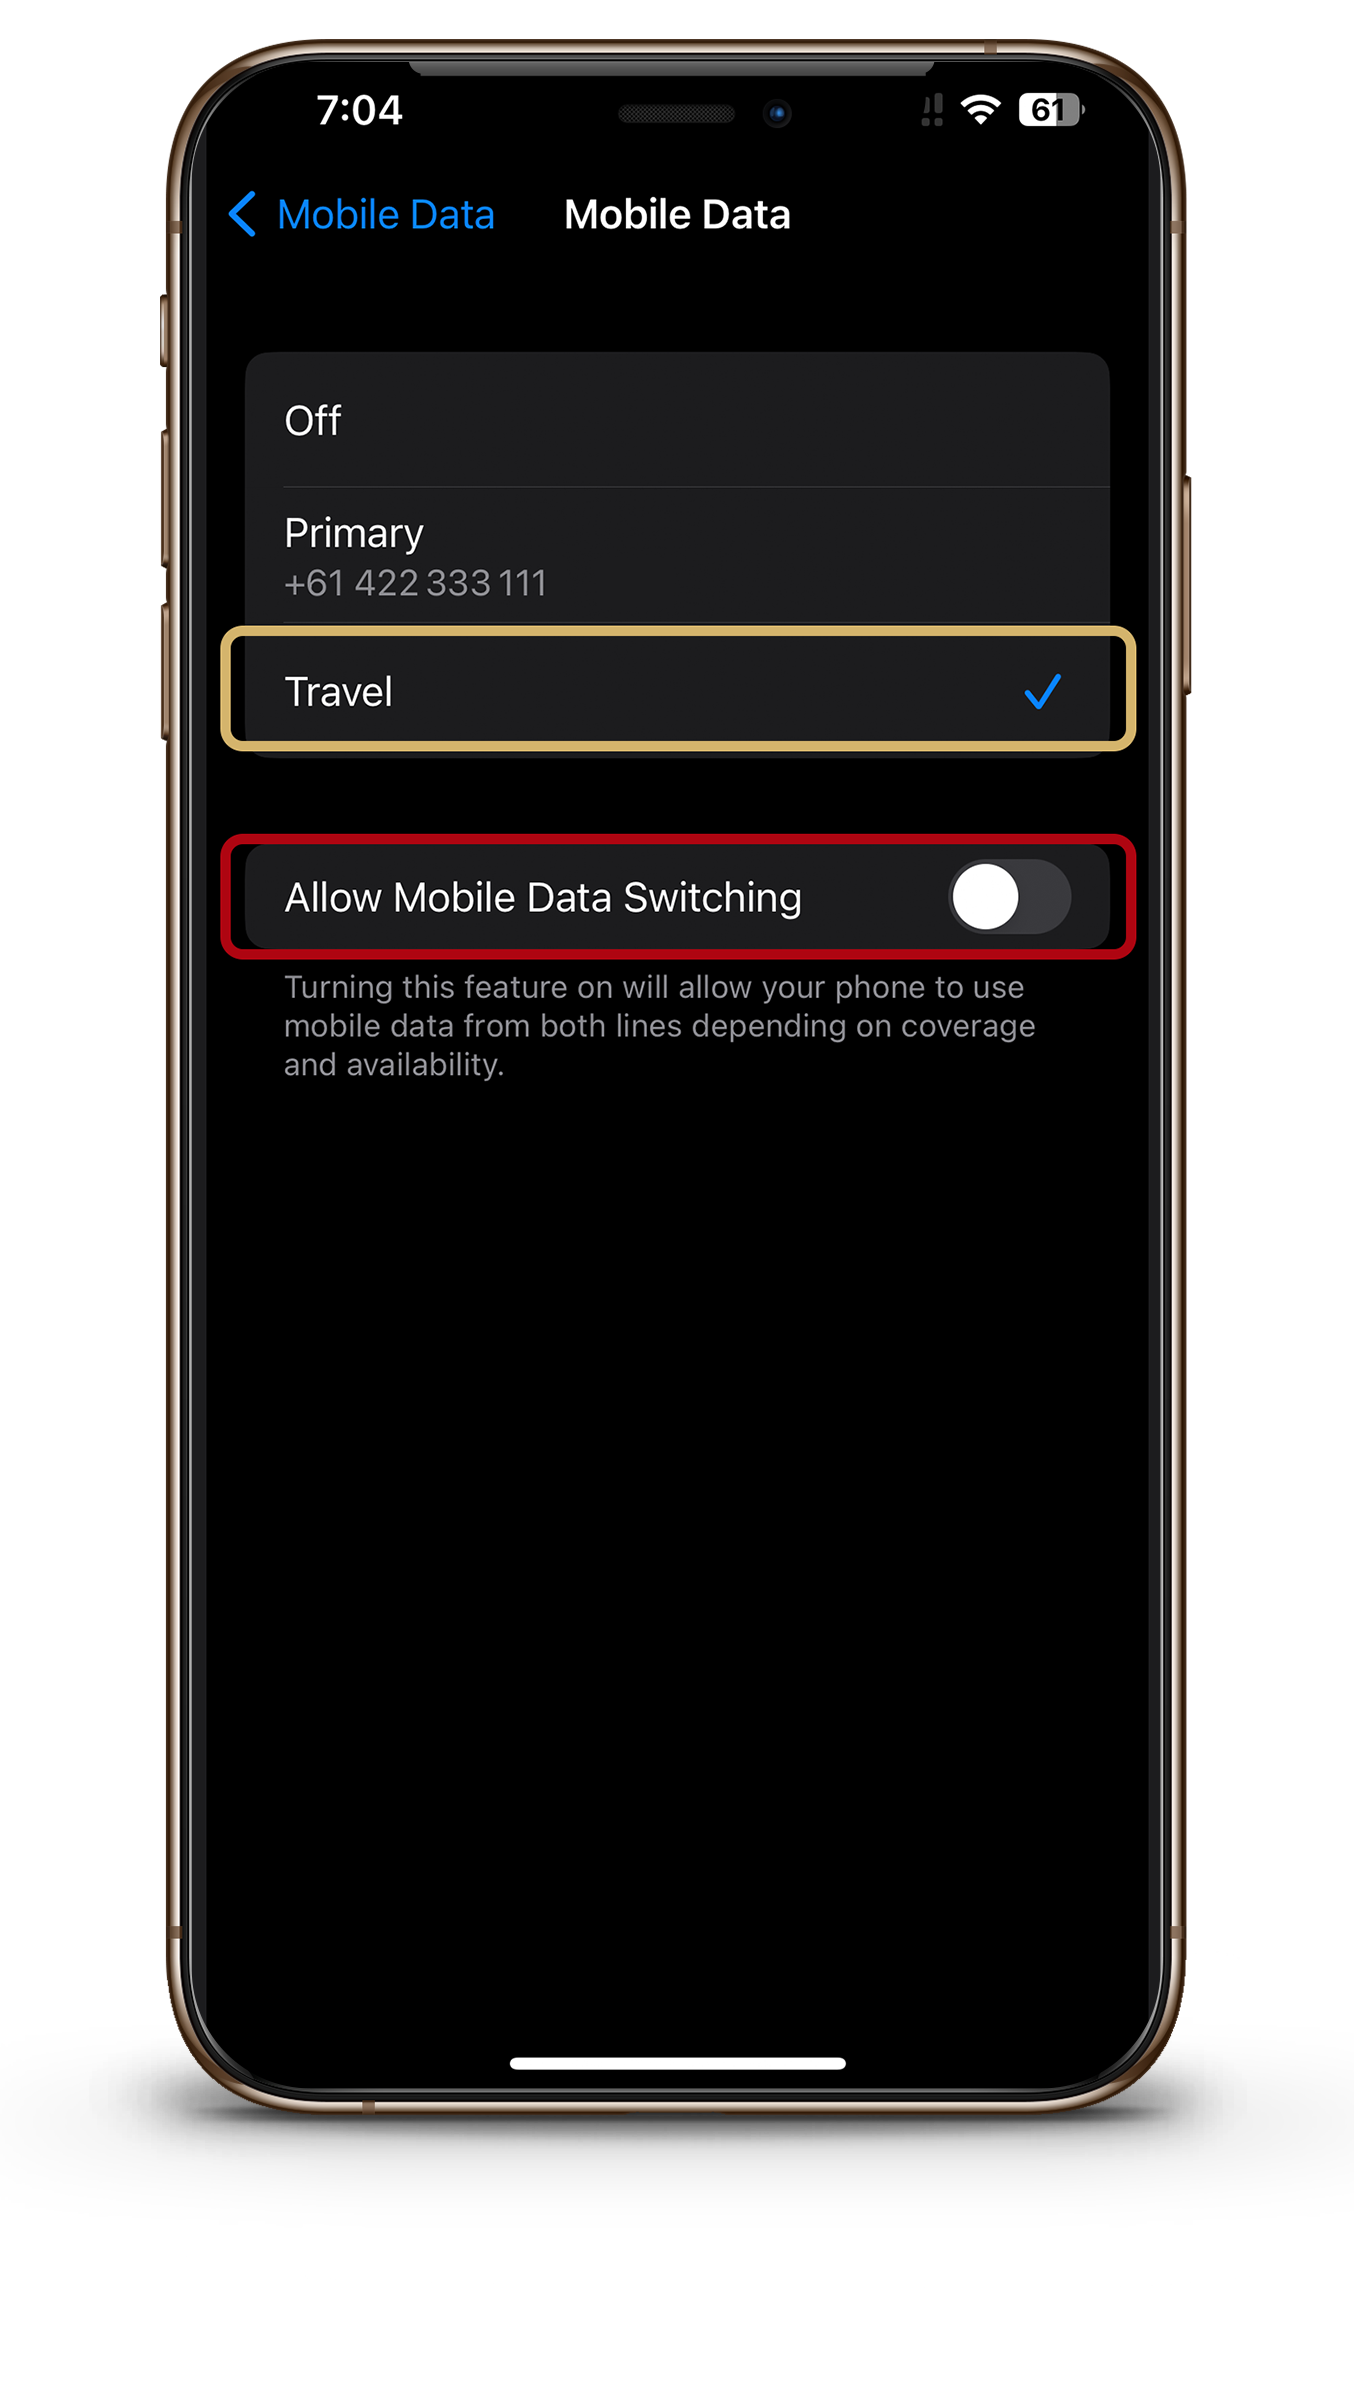
Select - Secondary/your eSIM
Leave the 'Allow mobile data switching' unchecked.
Step 1: Before Travelling
SCROLL ACROSS TO REVEAL ALL OF THE STEPS.
Installing your eSIM requires a network connection. We advise securing a stable WiFi or mobile data connection for eSIM setup prior to your departure.
1
2
3
4
4
4
5
6
7
8
9

Go to settings - Cellular/Mobile Data

Select - Add eSIM

Select use QR code
The QR Code will be sent to you via email upon purchase.

Select Enter Details Manually
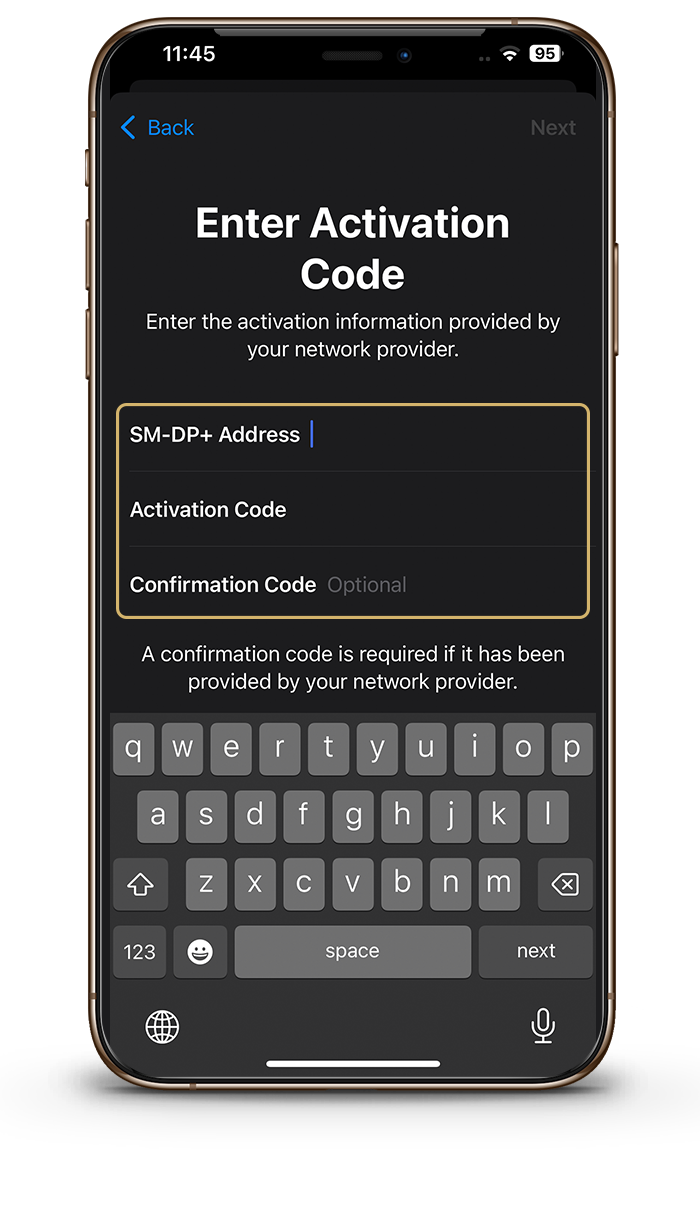
Enter Activation Information
The required details will be on your purchase email.

Activate your eSIM

Click done once activated

Label your eSIM
Call your eSIM something like travel or the country which it will be used in.

Choose your Default line
The eSIM provides data only so please choose Primary.

Select Primary
Please choose Primary iMessage & Facetime.

Select Primary
Please choose Primary for iMessage & Facetime.
Step 2: Once you Arrive at your Destination
Now it's just a matter of switching your data needs to your eSIM.
1
2
2

Go to settings - Cellular/Mobile Data

Select Cellular/Mobile Data

Select - Secondary/your eSIM
Leave the 'Allow mobile data switching' unchecked.
Android Guides
Automatic (scan QR code)
Manual (enter activation code)
Step 1: Before Travelling
Scroll across to reveal all of the steps.
Installing your eSIM requires a network connection. We advise securing a stable WiFi or mobile data connection for eSIM setup prior to your departure.
* Example Based on Google PIXEL
1
2
3
4
5
6
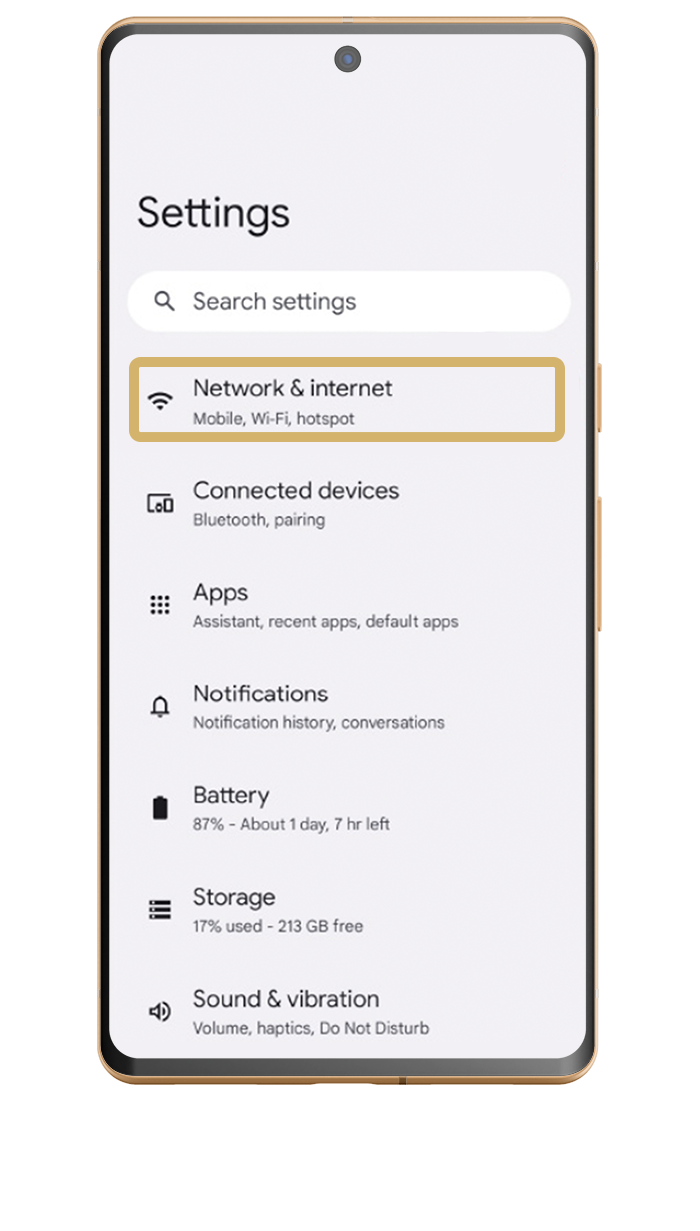
Go to settings - Network & Internet
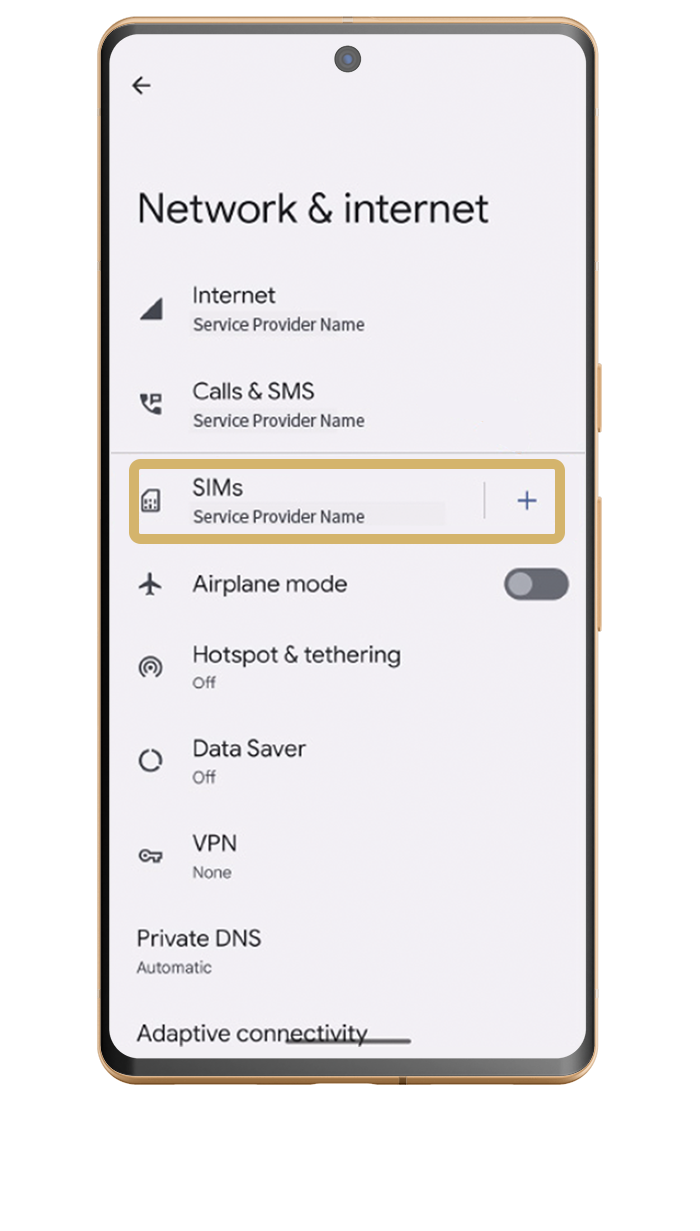
Locate SIMS - Tap +

Select - Download a SIM

Scan QR code
The QR Code will be sent to you via email upon purchase.
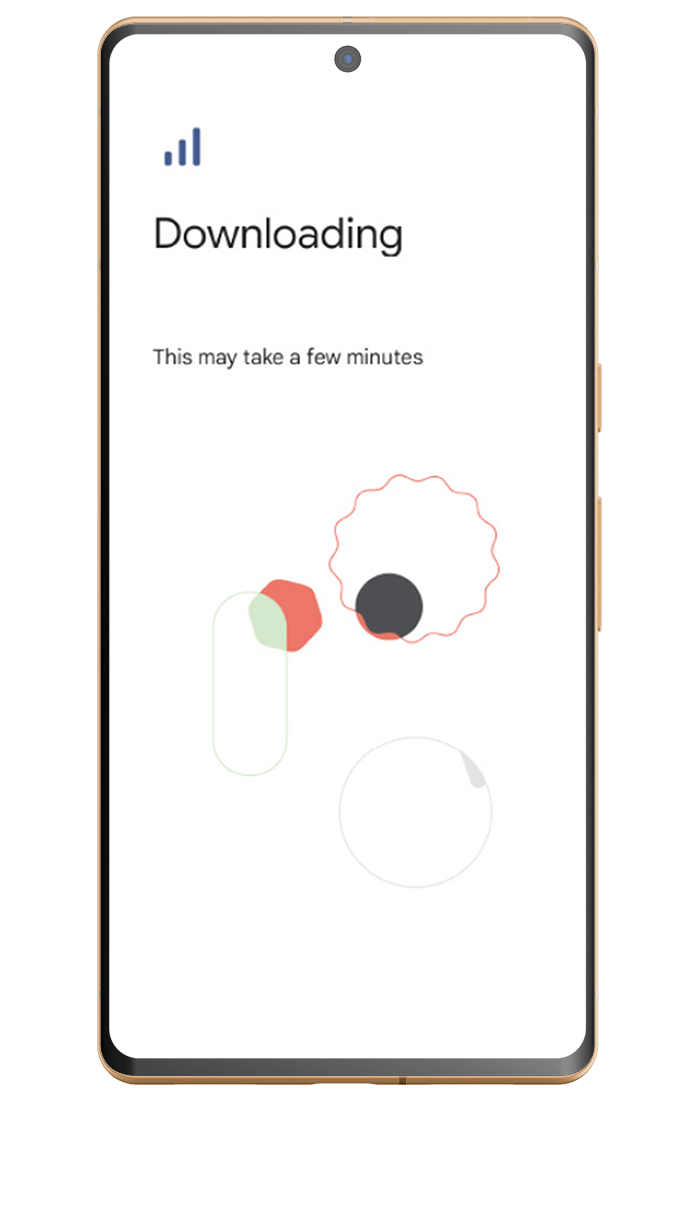
Wait for download
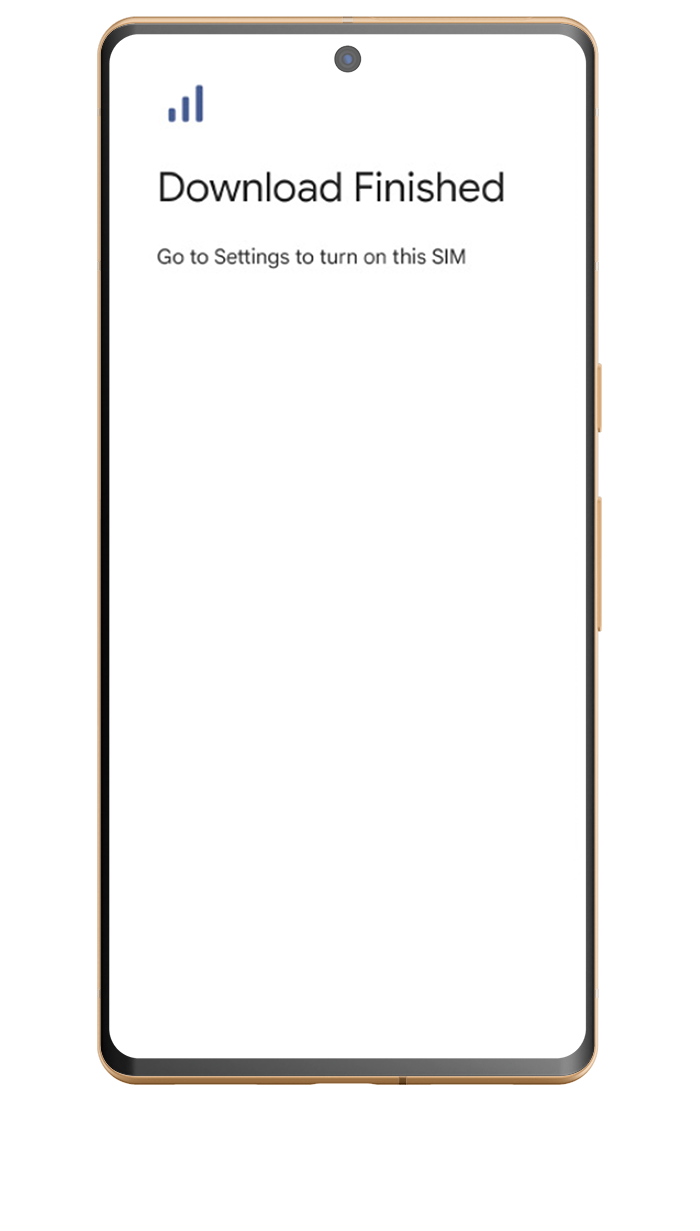
Successful Installation
Step 2: Once you Arrive at your Destination
Now it's just a matter of switching your data needs to your eSIM.
1
2
3
4
5
6
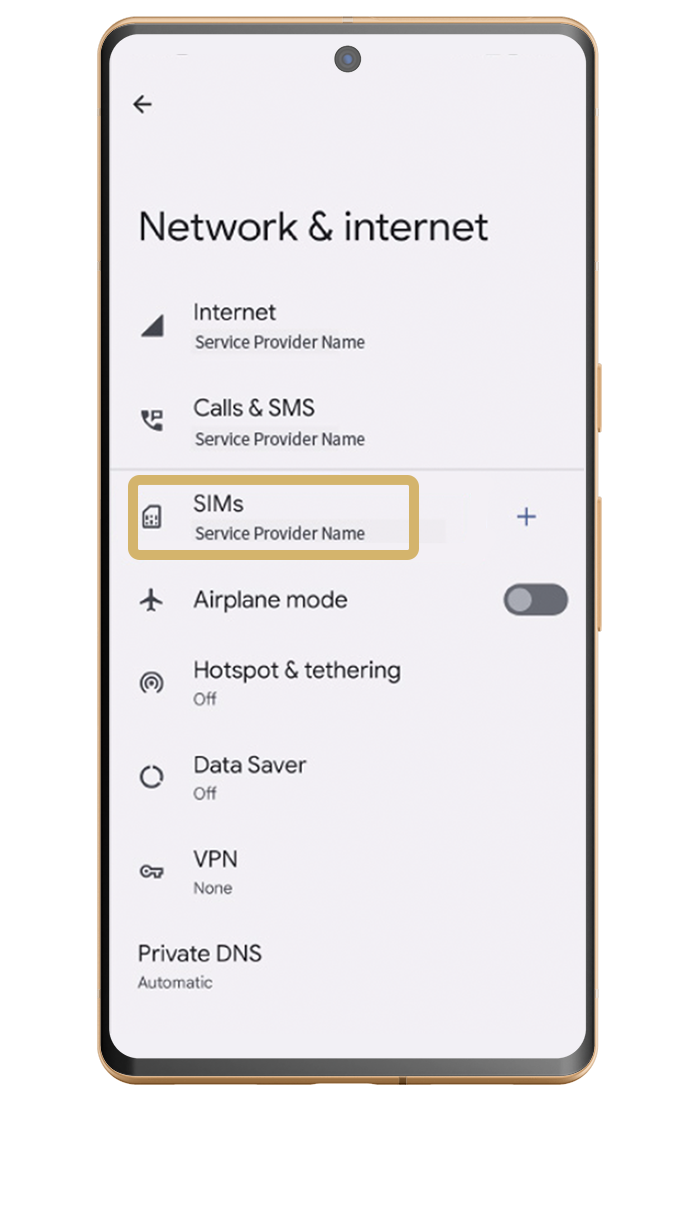
Go to settings - network & internet - SIMs
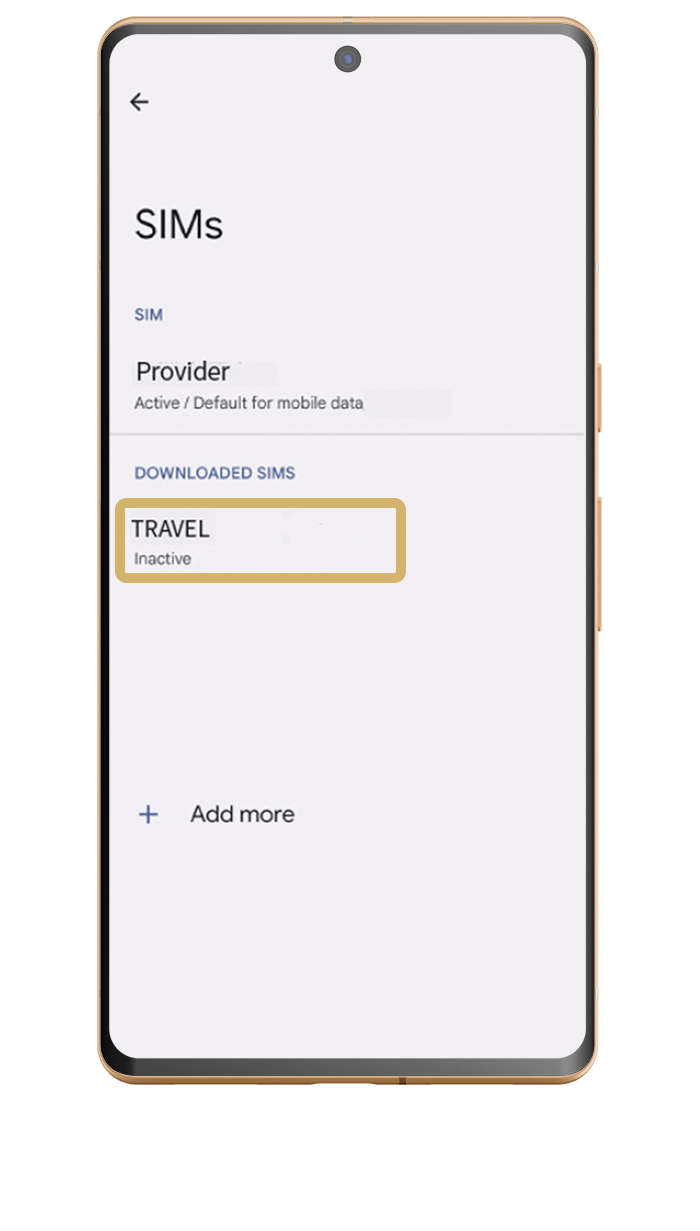
Select your new eSIM
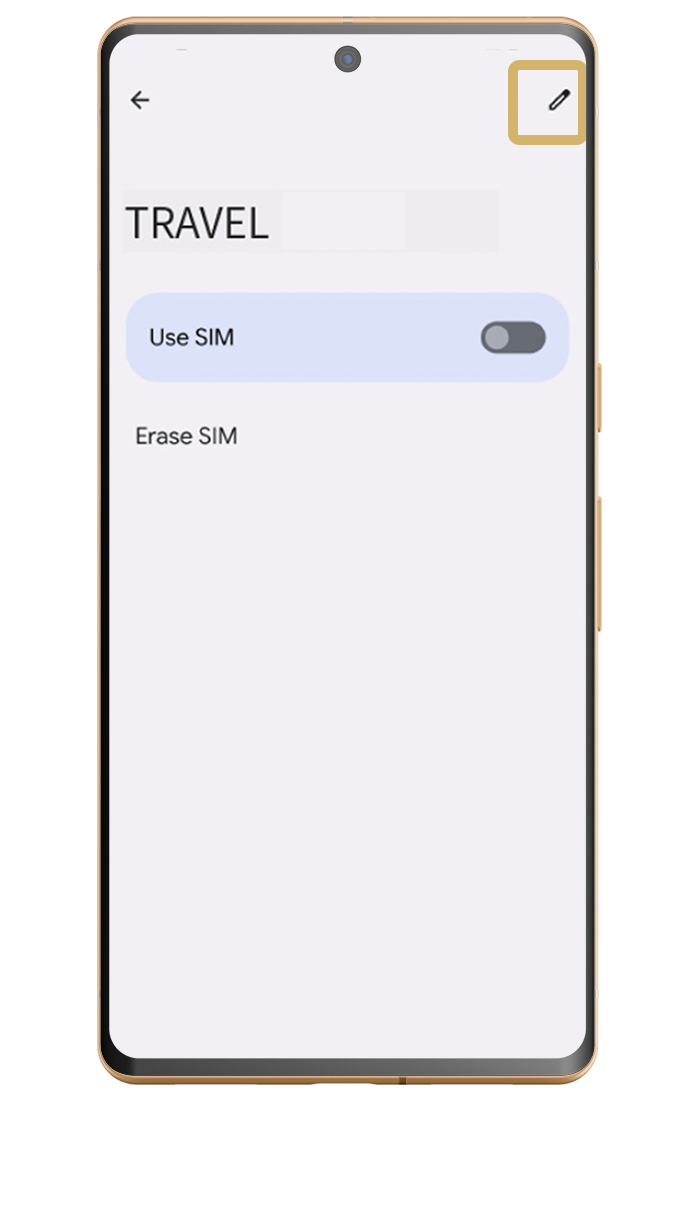
Select the edit button
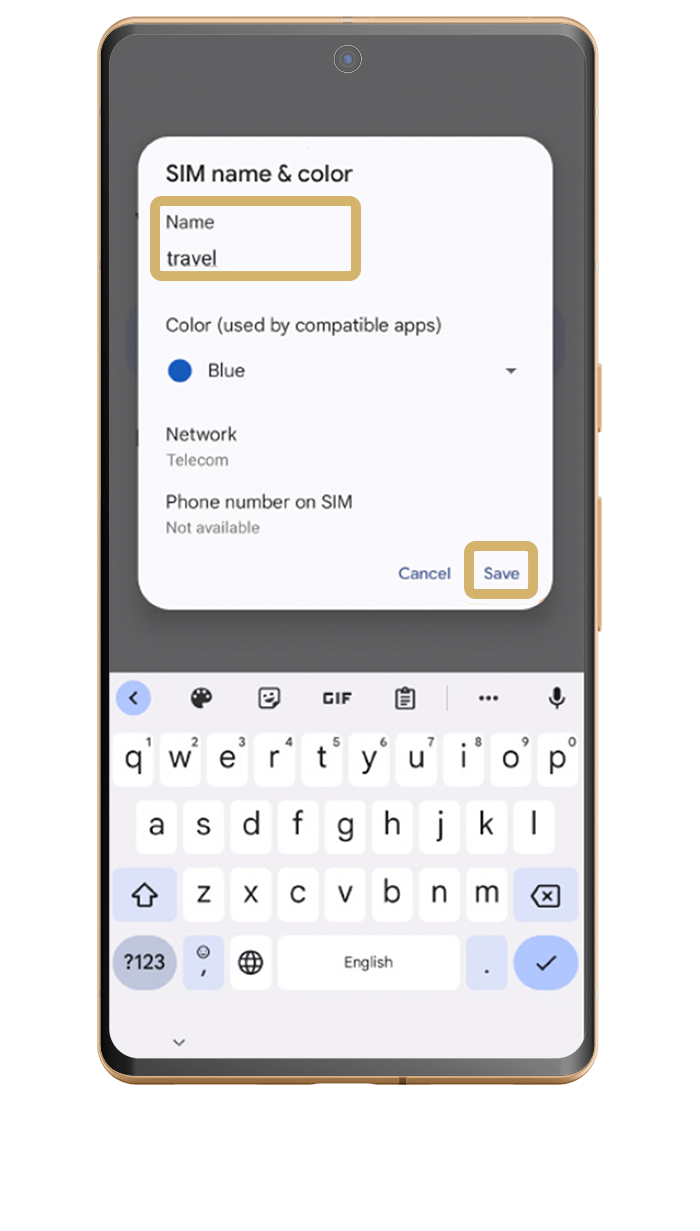
Name your SIM and click save
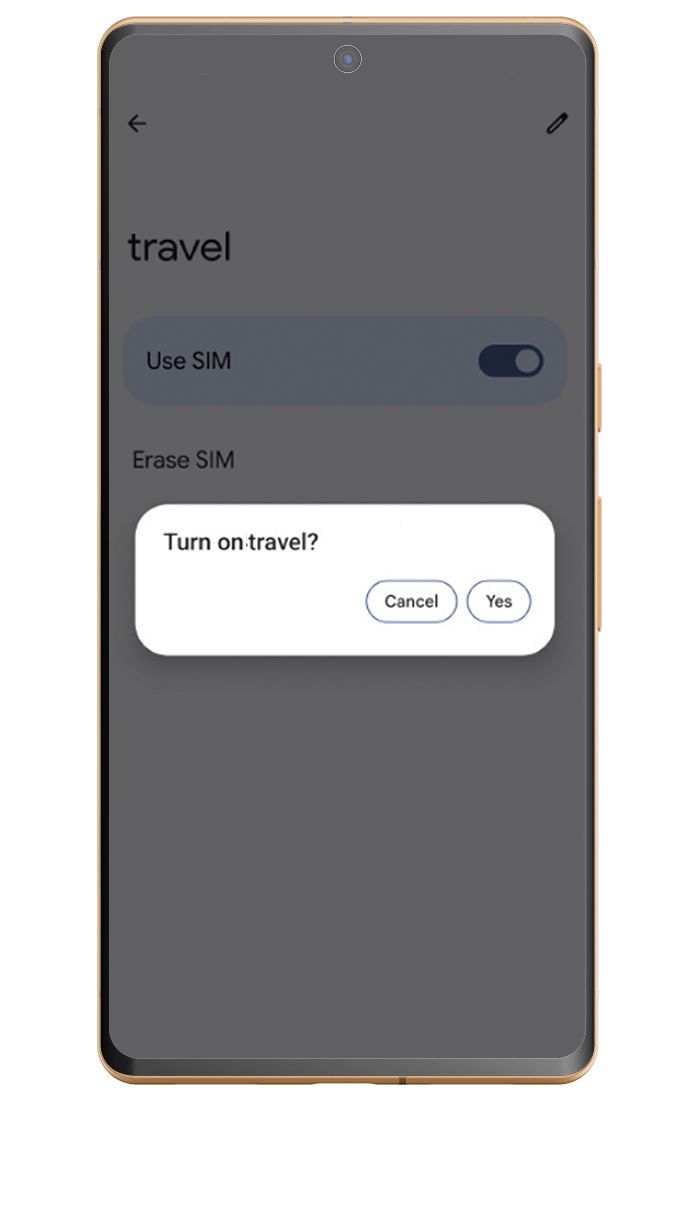
Click 'use SIM'
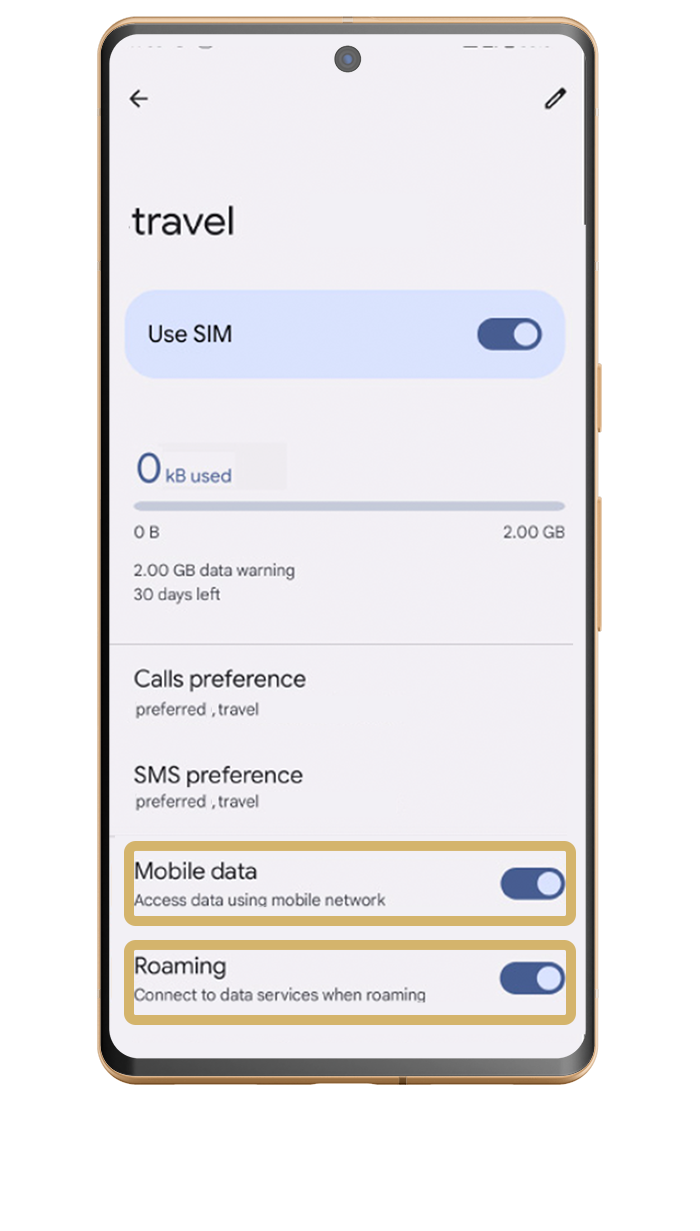
Turn Mobile data and Roaming to ON
Step 1: Before Travelling
Scroll across to reveal all of the steps.
Installing your eSIM requires a network connection. We advise securing a stable WiFi or mobile data connection for eSIM setup prior to your departure.
* Example Based on Google PIXEL
1
2
3
4
5
6
7
8
9

Go to settings - Network & Internet

Locate SIMS - Tap +

Select - Download a SIM
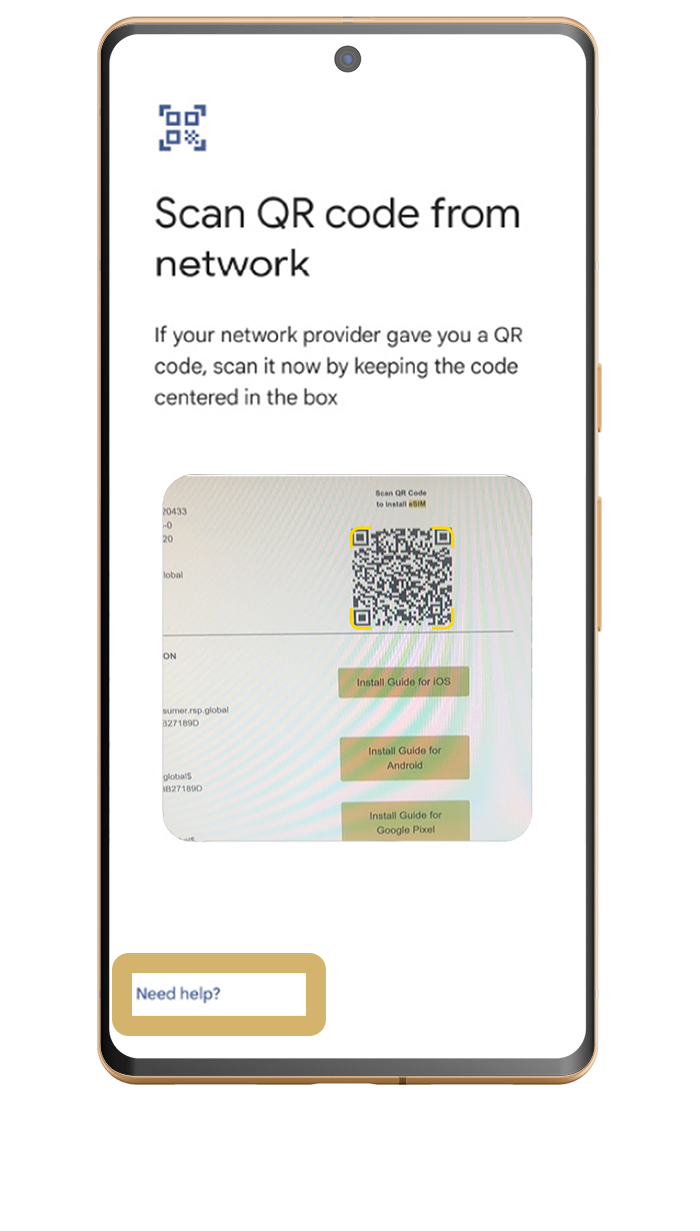
On Scan QR code screen - select help
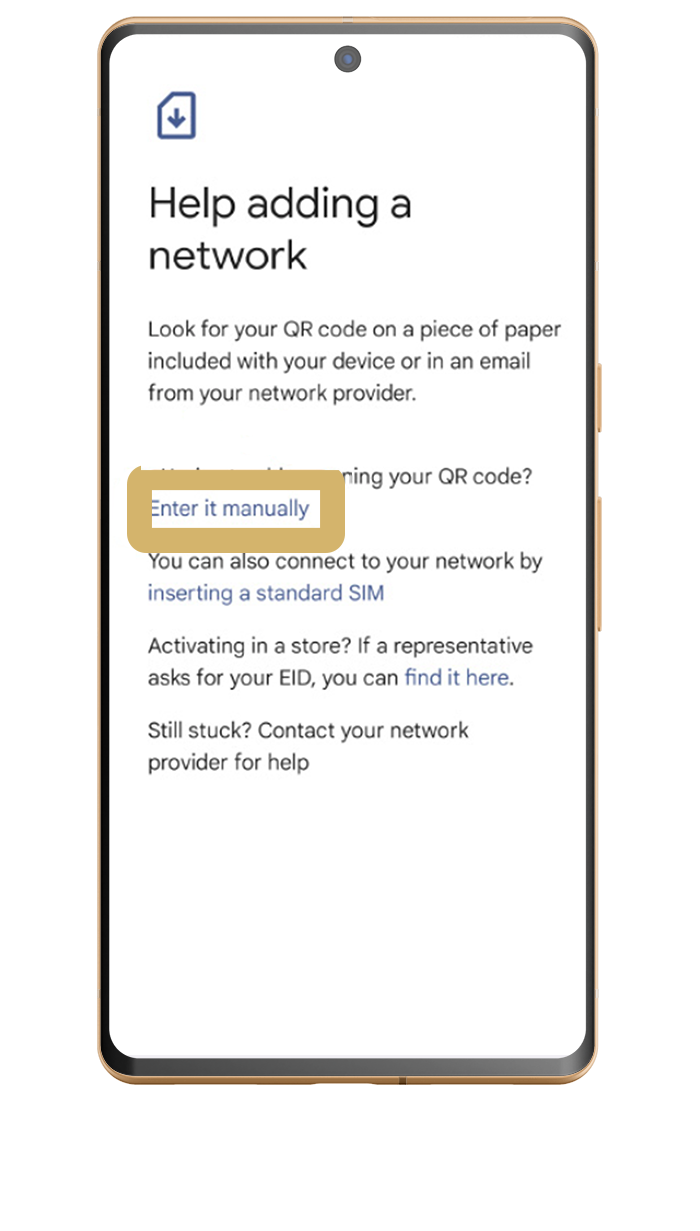
Select - enter it manually
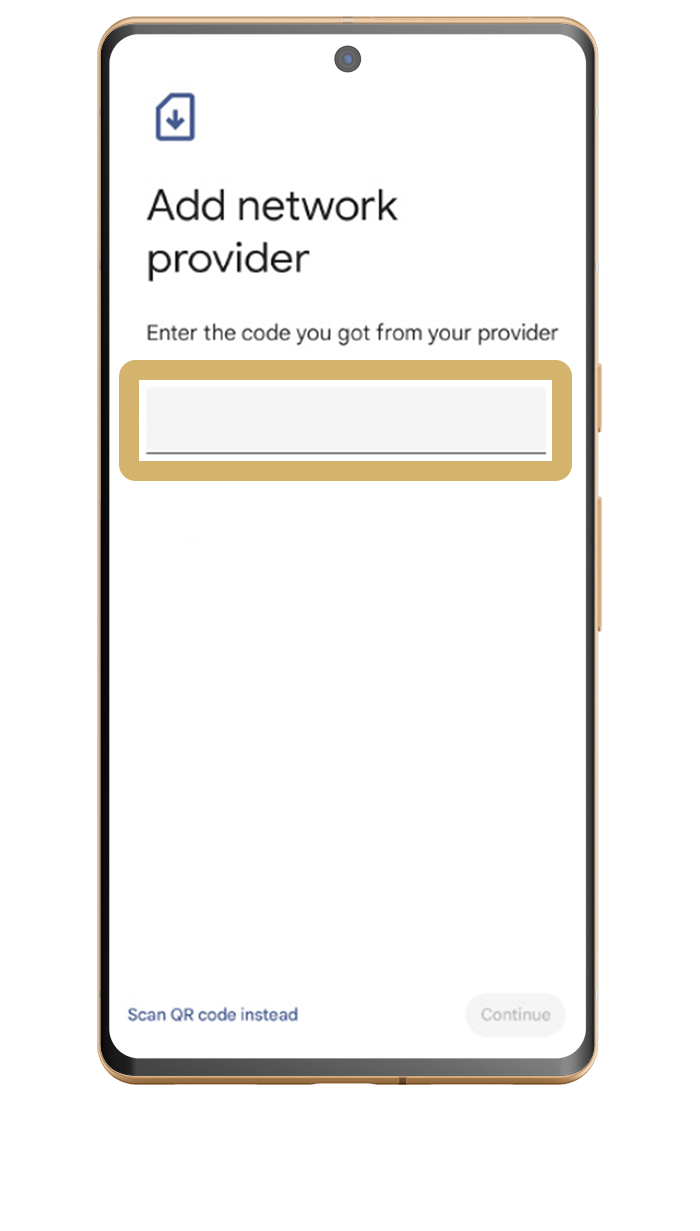
Add Network Activation code

Select download

Wait for download
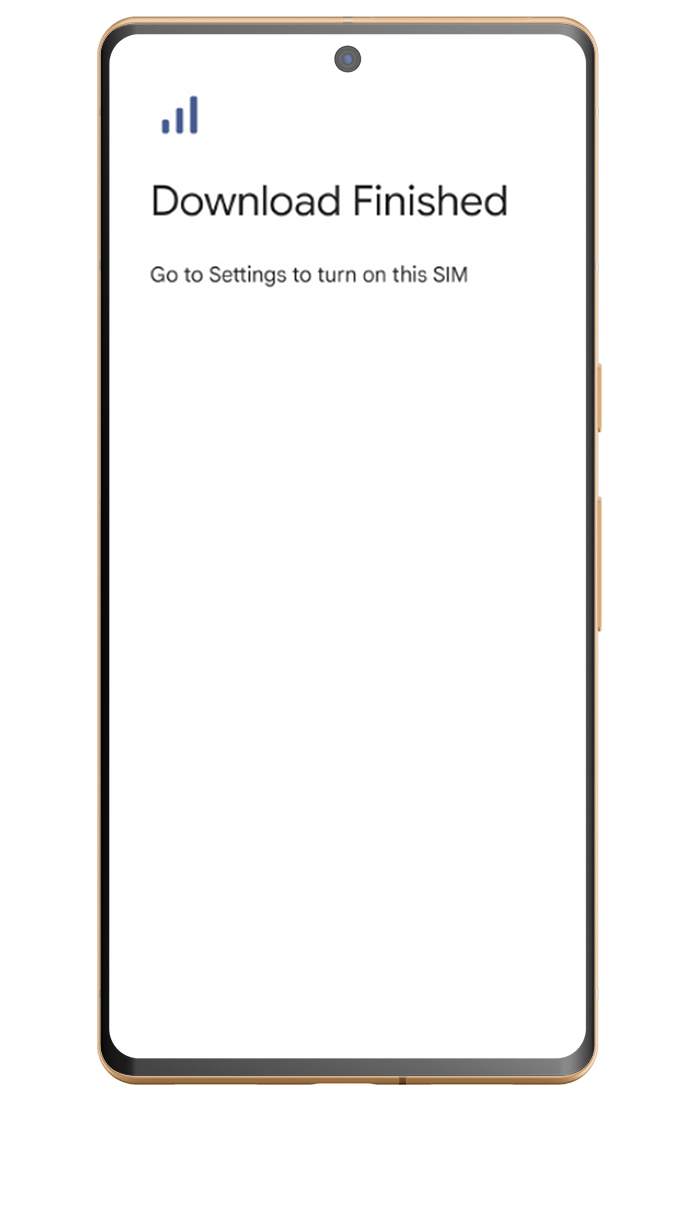
Successful Installation
Step 2: Once you Arrive at your Destination
Now it's just a matter of switching your data needs to your eSIM.
1
2
3
3
3
3

Go to settings - network & internet - SIMs

Select your new eSIM

Select the edit button

Name your SIM and click save

Click 'use SIM'

